
NCR-80
The NCR-80 is a very simple board whose point of interest is in its classic Cherry G80-series look, and ended up being my gateway into becoming the Cherry simp that I am today. It’s not the most luxurious keyboard out there, but it’s a nice addition to a collection of aesthetics.
Design/Aesthetics
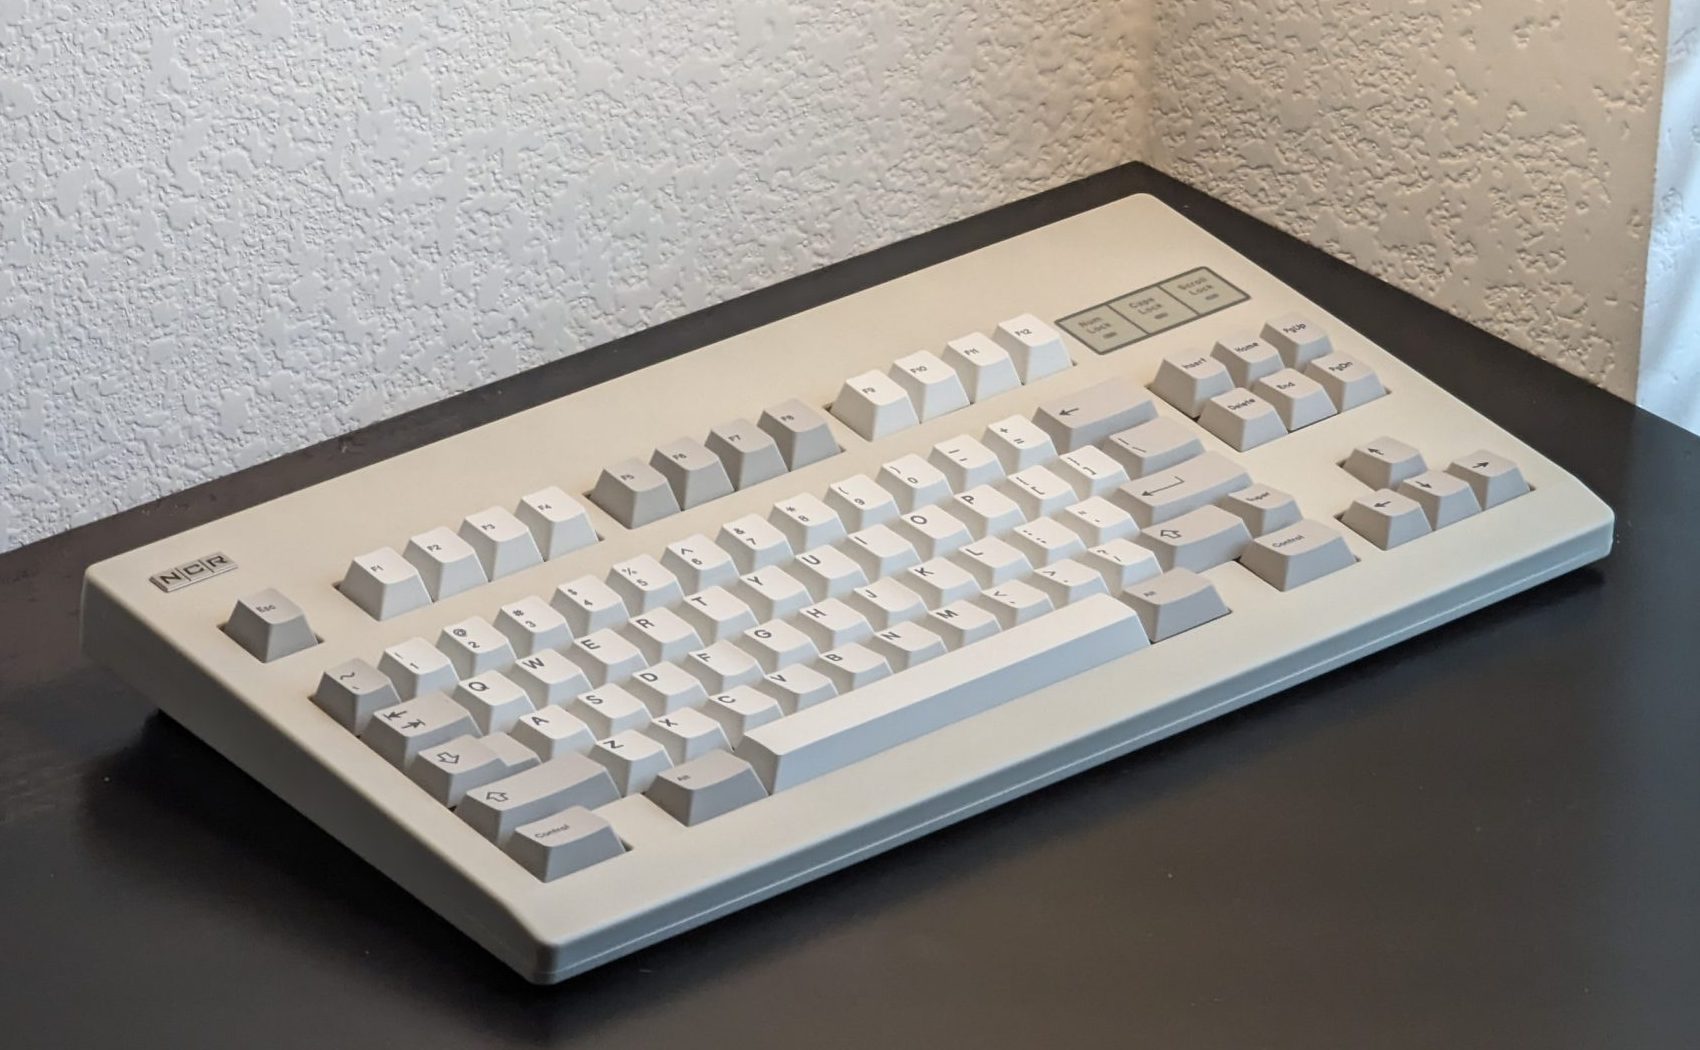
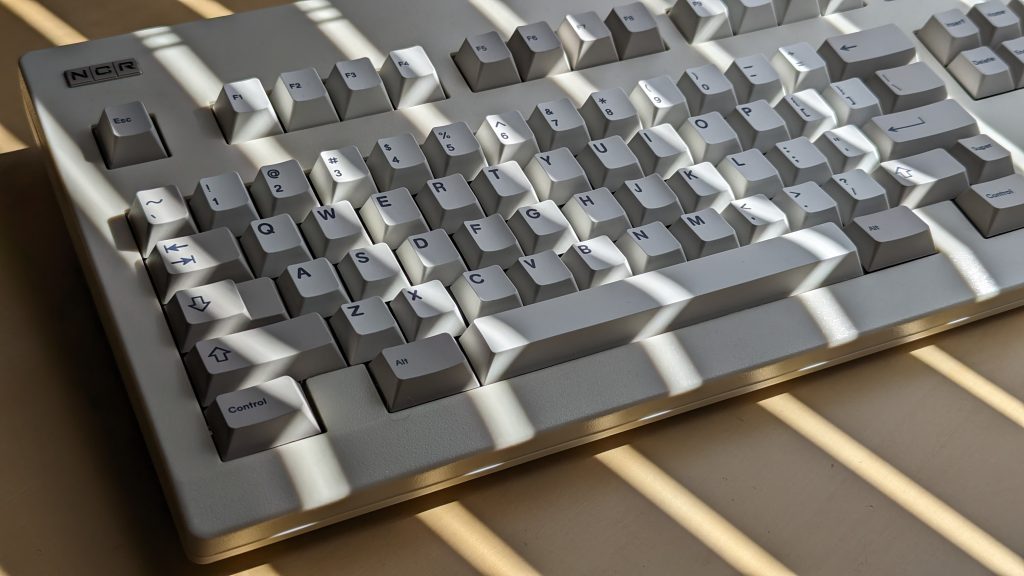
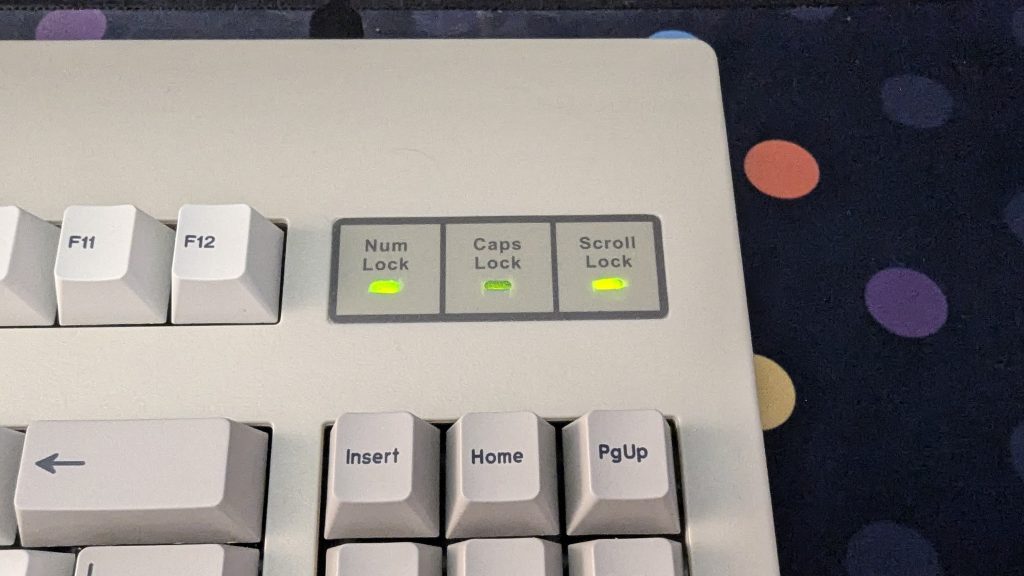
As mentioned, the NCR-80 aims to mimic the older Cherry G80 designs, aiming specifically for the G81-3000 which was a commissioned board for NCR, the old point-of-sale technology company. Immediately visible is the two-piece case with a seam in the middle joining the two parts together, with the top case being mostly flat except for the iconic, longer Cherry Lip at the front and a tall forehead on the opposite side. Also atop the top case is a faux NCR badge at the top left, and also LED lock indicator windows at the top right where Print/Scroll/Pause would normally go. The NCR-80 is available in either full WK or WKL, which while I don’t like WKL typically, felt it was the most appropriate for this kind of board.
Flipping the board to the back reveals a similarly simple bottom case, with a slight indent for room to pick up the board and show off the box-on-wedge side profile. The bottom case also features a product sticker mocked up to look like a retro electronics compliance sticker. The case also features two flip-out feet that drastically bring up the typing angle, and I generally keep them in. Speaking of feet, the NCR has some pitiful feet by default. Four small strips of rubber with barely any depth does not help the case from reverberating against the desk, so I opted to put some regular bump-ons on the back two corners to both give the feet some substance, and only slightly raise the angle.
Complaints about the construction of the board aside, it’s a stunning board even when you look close, and is certainly catches my eye amongst all the more visually bright keyboards in my collection.
Assembly
The NCR-80 is like any typical two-piece tray mount, with 6 screws on the perimeter of the bottom case fastening both cases together, opening up to reveal both the screw points for the tray mount, but also a very uncommon daughterboard for a tray mount keyboard, which is welcome nonetheless. Personally, I omitted most of the screws to give the typing experience a less restrained feel, but as usual you may assemble your board as desired. It’s simple enough to disassemble and rebuild as needed. The PCBs also require that you solder your own LEDs, including the ones for the LED indicators which actually use switch footprints that are connected to the matrix and everything, which is strange but whatever works, I suppose. The included green LEDs are very inconsistent, however. In my set, the LEDs ranged from barely visible in low light to actually being sufficiently bright in normal lighting conditions (window open and with my light panels on), so I would recommend giving them a test akin to testing hotswap sockets before soldering them in to make sure they are bright enough, and if no then buying a small set of replacement LEDs online. The cutouts on the indicator panels are also not quite the same size as the windows are seen from the outside, meaning that the light can easily bleed outside the windows, which I remedied with a bit of tape.
PCB and Firmware
Both the hotswap and solder PCBs come with Via-ready QMK pre-flashed on them. The hotswap PCB is very barebones only offering stepped caps lock as an option, while the Solder PCB offers pretty much all necessary options and tons more (I think it has JIS and even 10u?). However, the latest R3 hotswap PCBs are forced to north-facing for some reason minus the alternate layout options. The R3 solder PCB for some reason makes some footprints north-facing and even the ISO enter west-facing, which is completely unnecessary for solder PCBs, and the LED points have been lost on all switches except caps lock. The R3 PCBs are completely gutted compared to R2, and it makes no sense. All PCBs feature two flex cuts that are oddly interrupted by traces in the middle, which severely undercuts (ha) their purpose to flex, and simply results in loss of sound. The daughterboard remains unchanged across rounds, however it is a proprietary daughterboard and does not follow the Universal Daughterboard footprint at all.
Typing Experience
I personally took on the challenge of doing plateless millmax hotswap for my build, as I had (and still have) commitment issues despite me now using Cherry MX Blacks and Browns for (almost) everything, and it was certainly painful, but it functions. Outside of the flimsy nature of using millmax sockets on a plateless build, the board surprisingly offers a small amount of flex in the middle of the alphas and by the spacebar. By default, the case is very hollow and resonates which can be for some people, but I personally wanted a slightly more solid sound, so I opted to add a decent amount of poly-fil throughout the case, and the PCB has a full-fledged tape mod to help with the flat sound caused by the flex cuts. As far as sound goes, the volume and pitch of sound greatly changes the closer to the forehead you get, with the bottom two rows being rather thin but sharp, and the F-row being still a little thin but more rounded out and deep, however the spacebar remains pretty good as far as a tray mount spacebar goes.
| NCR-80 |
|---|
 |
| Case Material • Injection Molded ABS Plastic |
| Plate • Plateless • Carbon Fiber • FR4 |
| Mount • Tray Mount |
| Included Parts • Case • PCB/Daughterboard and LEDs (if solder) • Plate • Screws |
| Cost • $90 solder plateless, $120 hotswap (YMDK) |
| Release Date • 2021 is the earliest content i can find |
Update (2026/01/17):
Since writing this article, I’ve gotten the itch for electrocapacitive boards, and while I’m still looking for just the right one, I decided to experiment with silent switches again after my time with the Tet. Knowing that I had a pretty roomy, plastic case, I decided the NCR would be my best-case scenario to find out if I truly would enjoy diving into EC boards. Boy was I right. I implemented a spare FR4 60% plate I had from my Bakeneko to try making the switches more stable (was kind of redundant because they were hugging nicely already, guess my MX blacks were scuffed), and tried some Gateron Silent Clears I had from a while ago, and I was overjoyed. I had tried to get some more for Christmas but didn’t realize that I needed Silent Clears, and that Gateron’s Clear SKU wasn’t just automatically silent, so I basically got Milky Yellow recolors. It was at this point I decided to jump the gun and try some Silent MX Blacks, just for the hell of it. In just under 3 hours I filmed and spring-swapped all 108 from an NK order from just a couple weeks back, and oh my god it sounded so good
Overview
The NCR-80 is easily best gotten as an R2 kit, as it offers the most compatibility and least frustration with technical choices, but even still it remains a striking statement piece for any collection due to its mostly faithful design to a classic board. Alternatives to look out for would be some of the vintage-inspired Vortex keyboards like the PC66, or if you want to dip into something more luxury, MMStudio does a great job with their Class-series boards. Finally, if you want this board but in metal (and actual mounting styles), the Jer80s is not the easiest to find, but it really is a cool board.
Gallery


This article is not sponsored or compensated for in any way. This article falls under Fair Use and adheres to the Copyrights of the mentioned brands. Any mistakes, feedback or clarifications may be directed to askme@cheesemanfuu.com.